And voila, here they are, as promised! Yay! Although I'm realizing that I would be better off taking pictures and posting on a more regular basis, rather than a whole pile at once...because it takes so long, but most importantly because I can't always remember the materials I used (name of stamp sets, paper, etc). Anyway, I'll do my best with these.
I used two paper packs, primarily...CTMH Twitterpated, a packet from last year that I was desperately trying use up because it has a fall theme (successfully used it up, BTW! yay! The frugal paper crafter in me jumps for joy ;)
AND a Fall paper collection from Oriental Trading. I rarely buy paper from them but they had some cute packs for very inexpensive the last time I was putting in an order, so I got sucked in. Their products are not always the top TOP-est quality, but usually I'm very satisfied with what I get for the price.
Here are the
Twitterpated cards:
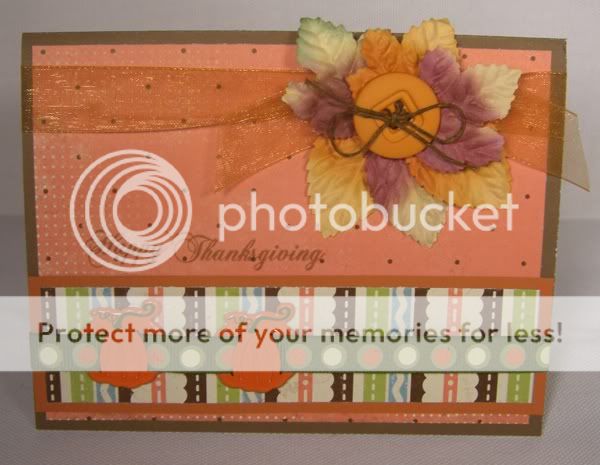


Additional materials used:
Paper leaves: Oriental Trading
Ribbon: CTMH
Pumpkin Brads: Oriental Trading
Stamp Set: Fall Elegance, Papertrey
Baker's Twine: Papertrey
Scallop Circle Punches: SU!
Markers: Bic
Ink: Chocolate, Sorbet, CTMH
Waxy Flax: CTMH
Oriental Trading cards:


All materials are from the OT fall theme paper packet, including the buttons, borders, corners, chipboard pieces & die cuts that match the chipboard pieces.
Additional materials used:
Stamp Sets: Fall Elegance, Papertrey; Dream Wishes, CTMH; Joy for the Journey, Verve
Ribbon/Twill/Hemp//Waxy Flax/Sassy Strands: CTMH
Large Brads: Paper Wishes
Bitty Sparkles: CTMH
Tools: Border Punch, EK Success; Scallop Circle & Circle dies, Spellbinders;


