Monday, November 22, 2010

Another Christmas card

I'm basically done with my Christmas cards, but I like to make more here & there when I have the chance. Most of the ones I made previously were 4.25" x 5.5" size, so I like to make some 5x7s also. For this one, I had some gorgeous snowflake chipboard glitter stickers that I got on massive clearance after Christmas this year and wanted to use them. So they were in the inspiration for this card.

I started with the green in the snowflakes and found some green cardstock to match, ran it through my Wizard with a 5x7 Cuttlebug Holly embossing folder. Then just added some ribbon and some patterned paper from another super cool clearance item I got last year, a We R Memory Keepers Christmas paper pack. Some red grosgrain ribbon, and some lovely little peppermint candy buttons and I was done! Then, of course, I had to fancy up the inside so I added more paper from the same pack and stamped the interior sentiment. Pretty easy, really!

Materials:
Chipboard glitter snowflakes: Kay & Co
Patterned paper: We R Memory Keepers
Buttons & ribbon: Misc (Oriental Trading, I think)
Embossing folder: Cuttlebug
Tools: Border punches, EK Success Slim Edgers
Stamp set (sentiment): Holiday Wishes, Papertrey

Photobucket
Photobucket

Friday, November 19, 2010

Thanksgiving Cards

And voila, here they are, as promised! Yay! Although I'm realizing that I would be better off taking pictures and posting on a more regular basis, rather than a whole pile at once...because it takes so long, but most importantly because I can't always remember the materials I used (name of stamp sets, paper, etc). Anyway, I'll do my best with these.

I used two paper packs, primarily...CTMH Twitterpated, a packet from last year that I was desperately trying use up because it has a fall theme (successfully used it up, BTW! yay! The frugal paper crafter in me jumps for joy ;)

AND a Fall paper collection from Oriental Trading. I rarely buy paper from them but they had some cute packs for very inexpensive the last time I was putting in an order, so I got sucked in. Their products are not always the top TOP-est quality, but usually I'm very satisfied with what I get for the price.

Here are the Twitterpated cards:
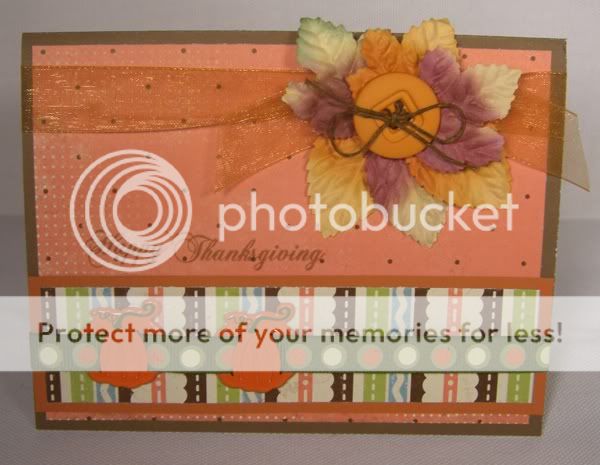
Photobucket
Photobucket
Photobucket

Additional materials used:
Paper leaves: Oriental Trading
Ribbon: CTMH
Pumpkin Brads: Oriental Trading
Stamp Set: Fall Elegance, Papertrey
Baker's Twine: Papertrey
Scallop Circle Punches: SU!
Markers: Bic
Ink: Chocolate, Sorbet, CTMH
Waxy Flax: CTMH

Oriental Trading cards:
Photobucket
Photobucket
Photobucket
Photobucket

All materials are from the OT fall theme paper packet, including the buttons, borders, corners, chipboard pieces & die cuts that match the chipboard pieces.
Additional materials used:
Stamp Sets: Fall Elegance, Papertrey; Dream Wishes, CTMH; Joy for the Journey, Verve
Ribbon/Twill/Hemp//Waxy Flax/Sassy Strands: CTMH
Large Brads: Paper Wishes
Bitty Sparkles: CTMH
Tools: Border Punch, EK Success; Scallop Circle & Circle dies, Spellbinders;

Get Well card

I made this card for my dad because he recently went through a serious back surgery and was in the hospital for 10 days. He had a rough time of it, but thanks to God, he's now leaving the hospital and on the mend, but it will be a long road to healing, so we keep on praying!

I wanted a card that represented the idea of going through a darker time and emerging into the light. Hence the gradation from a deeper blue to the yellow. I love this idea too because it enables me to use up a lot of my paper scraps! I'm such a frugal paper crafter...I rarely throw any pieces of paper away until they're super tiny. Therefore I have a HUGE pile of scraps (albeit nicely organized in an accordian folder by color). The folder grows by the day, so often I challenge myself to create a few cards just with scraps, (except for the card base). I love how this one turned out! (other than the sentiment not stamping too crisp...I guess I need to find a better solution to stamping on vellum!)

Here's the card:

Photobucket
Photobucket

Some old cards

So to anyone who might be reading this, it's probably painfully clear that I'm not entirely blogger prolific yet...there are many days in between my posts. I'm still getting up to speed with this whole blogging deal, and though I've made MANY cards since my last post, I haven't gotten in the groove of immediately taking pictures and posting the same day. I'll have to work on getting the hang of that. For now, I was going through a folder that has cards I've made in the past and found a few that I haven't posted here yet, so thought I'd share. These were from quite a long time ago (maybe January of this year?) but still kind of fun. I'll be posting my more recent cards later today (hopefully!) that I've made for Thanksgiving, etc. For now, here are some older cards.

Mom's Birthday Card
Photobucket


Rob's (brother) Birthday Card
Photobucket
Photobucket


Neighborhood Card
Photobucket

Friday, November 5, 2010

Tea Party Birthday Invitations...

It's that time of year again...(well, not quite yet, but I'm getting a big head start)...Natasha's birthday! Hard to believe she will be turning 7 in less than a couple of months. This year we're having her birthday party at a local tea room...so adorable! We just discovered that it existed recently, and as soon as we saw it, we knew we had to do her party there. She is so excited! Because of the tea party theme, I just had to have two sets that I saw from Waltzingmouse Stamps ~ Afternoon Tea & Afternoon Tea Sentiments. I used these two sets along with the one I used for all those tags in the previous 9 posts ~ Vintage Labels No. 2 ~ to make her birthday invitations. (Note: I just figured out how to add links to my posts ~ fun! ~ I hope this is helpful for anyone who might be reading my little ole' blog...I'm kind of new to this, but this is the start of much to come!) :)

I usually use an inspiration card or a sketch to jump start my cards, but this one I did totally from scratch! I'm very happy with the way it turned out. Now that I have the "prototype" ;) made, I just have to create an assembly line to make the other 10. Though I tried to make it fairly simple, I didn't succeed very well...I just love elaborate cards, what can I say! Hopefully the assembly line process will streamline the production. I need to get these out early because the cafe & tea room where we're having the party needs to know as far in advance as possible how many people to plan for. This is why I'm working on it so early this year. Also, it's nice to get these taken care of early because I have so many other projects scheduled for December, what with all the handmade gifts I have in the hopper.

I might post more of the invitations later as they will likely be several that are slightly different, due to the fact that I don't have enough paper to make them all exactly the same. Should be fun to see how the others turn out as well.

Materials used:
Stamp Sets: Afternoon Tea, Afternoon Tea Sentiments, Vintage Labels No. 2 (Waltzingmouse Stamps)
Patterned Paper: Stampin' Up Tea Party Designer Series paper
Cardstock: Papertrey Sweet Blush & CTMH Baby Pink
Ribbon: Stampin' Up poly twill in Saffron
Ink: CTMH Grey Wool, Baby Pink
Tools: Spellbinders Nestabilities Labels 2, EK Success border punch

Photobucket

Photobucket

Thursday, November 4, 2010

Waltzingmouse Tag #9 - last one!

This is the last one, #9. I enjoyed making this set for this challenge...not to mention the double blessing that I'm now set for tags for nine of my Christmas gifts for this year! For this one I used a glitter gold embossing powder on the frame, stamped the center tag with gold pigment ink (stamp from Papertrey 2008 Holiday Tag Collection set) and stamped the Papertrey Signature Christmas sentiment in Cranberry ink (from CTMH)...whew!! I hope you enjoyed taking a look at this tag set. Merry Christmas (early!)

Photobucket

Waltzingmouse Tag #8

I love this one! This particular stamp from Waltzingmouse Vintage Labels No. 2 stamp set is SOOOO pretty with embossing powder. It heats up very nicely and melts very smoothly. For the center stamp in Versamark ink I used a tag stamp from Papertrey's 2008 Holiday Tag Collection set. The sentiment "Holiday Treats" is from Papertrey's set Holiday Treats (oddly enough ;). That really cool fabric covered brad in the center I believe I got awhile back from Oriental Trading. I love how it adds to this tag perfectly!

Photobucket

Waltzingmouse Tag #7

For #7 I used silver embossing powder on the frame, punched the center out with a 2" scallop circle punch, and stamped with a stamp from Papertrey's 2008 Holiday Tag Collection. The sentiment is from Papertrey's Holiday Wishes set.

As a recap, this tag is part of a set of 9 that I created all from the same Spellbinders Labels 2 die for the Waltzingmouse Tag You're It Challenge.

Photobucket

Waltzingmouse Tag #6

For #6 I was going for a Candy Cane theme...I can never resist the traditional red & white for Christmas! I used a red glitter embossing powder - so pretty & shiny - on the outer frame and the same Winter Wonderland embossing powder as #5 on the inner frame. The sentiment, from Papertrey's Signature Christmas, is stamped in silver pigment ink. The center frame is punched with a Stampin' Up Curly Label punch. I also tied the ribbon with some Papertrey baker's twine in Pure Poppy. I love that effect!

Photobucket

Waltzingmouse Tag #5

For #5 I used white embossing powder on the outside frame stamps, and the sentiments, from Papertrey's Holiday Wishes, are stamped in White Daisy pigment ink from CTMH. The fleur de lis is also from the Waltzingmouse set Vintage Labels No. 2. For that, I used a special embossing powder I have called "Winter Wonderland". It is white with silver glitter in it. Very pretty! The paper is Bazzill cardstock Swiss Dots.

Photobucket

Waltzingmouse Tag #4

Wow, here is Tag #4 out of the set of 9...the sentiment is from Papertrey's Signature Christmas.

Photobucket

Waltzingmouse Tag #3

Waltzingmouse Tag You're It Challenge continued...

This is Tag #3. I know it looks very similar to numbers 1 & 2, but keep in mind that I made these as a set, and used Vintage Labels No. 2 stamp set for all of them. There will be other tags that look a little bit different. The additional materials used here the same as Tag #1.

Photobucket

Waltzingmouse Tag #2

Waltzingmouse Tag You're It Challenge continued...

This is Tag #2.
Additional materials used are similar to Tag #1, except I used silver pigment ink & embossing powder instead of gold (see previous post for details)

Photobucket

Waltzingmouse Tag You're It Challenge

One of my new favorite stamp companies, Waltzingmouse Stamps, is having a challenge to create some beautiful Christmas tags. I recently got four stamp sets from them and so of course I wanted to use at least one of the sets...it is Vintage Labels No. 2, one of many that coordinate perfectly with Spellbinders Nestabilities dies.

I already had Spellbinders Labels 2 so I got this set to "fancy them up"! I made a set of 9 tags that I plan to use on gifts of baked yummies for Christmas for neighbors and church members. They're all a somewhat similar design, but they use a variety (almost all) of the stamps from that stamp set. I will post each one separately so I can enter 9 times in the challenge, thereby increasing my chances of winning some Waltzingmouse goodies! ;) (I hope so!!!)

Here is Tag #1:
Additional materials used:
Stamps: Papertrey 2008 Holiday Tag Collection (you can't see it well in the picture but behind the sentiment is a wreath stamped in Versamark ink) & Signature Christmas
Organdy Ribbon: CTMH
Gold embossing powder: CTMH
Gold pigment ink: ColorBox

Photobucket

Handmade Christmas gifts...the start...

This year, I got the idea that I wanted to hand make a lot of my Christmas gifts. I've been terribly inspired by so many of the ideas at Papertrey...notepads, stationery, calendars...I'm very excited to be able to try these kinds of things for the first time. My first project to try was these adorable altered notepads. I bought them from Papertrey along with a stamp set designed specifically to make these called Take Note. I got the ideas for the covers from many of the different designer's blogs. They turned out so cute! I decided to make these as teacher gifts, so I made these into "Books to Read" lists. I can't wait to make more! (I'll post them as soon as I do!)

Materials used:
Cover template downloaded from a Papertrey download (I don't have the link handy but it's on one of the release posts for the stamp set "Take Note")
Patterned Paper: Stampin' Up
Ribbon: CTMH
Buttons: Basic Grey & other assorted

Photobucket

After a long absence...

Well, the last 8 months have obviously been very crazy...I haven't posted in ages! For many months I was unable to make it to my craft room, and then my little one started preschool and finally I had some free time a few hours a week to work on my cards again. Starting in September, I began making my Christmas cards and now they're pretty much all done. I've been wanting to share them here on my blog for a long time, but was lacking a way to take decent pictures effectively. Now that I've come up with something, (though it's hardly professional) I've taken pictures and will post my Christmas cards. Because there are so many and I'm so behind, I'm just going to post them all in one post...just the pictures. If anyone (and I don't expect a ton of people to be looking at my blog just yet, but still) is interested in any details of any of the cards, feel free to ask and I'll try to remember what materials I used. Here goes!!!...(in no particular order of creation)

Photobucket

Photobucket

Photobucket

Photobucket

Photobucket

Photobucket

Photobucket

Photobucket

Photobucket

Photobucket

Photobucket

Photobucket

Photobucket

Photobucket

Photobucket

Photobucket

Photobucket

Photobucket

Photobucket

Photobucket

Photobucket

Thursday, February 4, 2010

Mojo Monday Challenge 2-01-10

This is my first time doing the Mojo Monday card! My friend Jessa has been doing them a long time, and has inspired me. I'm trying to step up my crafting "game", so to speak, so wanting to get more into the world of following designers, making & submitting cards for contests & publication (maybe someday!), and just trying to improve my creative skill, so that hopefully one day I might be able to be good enough to pursue something within the paper crafting field as a career, even if it's only part time.

This card was a lot of fun, because I ADORE Valentine's Day colors & images. I always go crazy every year buying up V-day stuff. I intended to use my new Verve Valentine's Day stamps (they're so cute!), but I decided to use this really cute big felt sweetheart sticker as the bottom focal point instead. And with these adorable V-day papers from Martha Stewart, what else does one need? ;)

Materials used:

Patterned papers - Martha Stewart Crafts Valentine's paper stack
Cardstock - Core'dinations Chocolate/Pink
5x7 Embossing folder - from Cuttlebug's exclusive Valentine's "Romance" bundle
Adhesive pearls - Close To My Heart
Epoxy brads - Stampin' Up
Border Punch - Doily Hearts; Martha Stewart Crafts
1-1/4" Grosgrain Pretty in Pink Ribbon - Stampin' Up
Felt heart sticker - JoAnn Fabrics & Crafts
Corner punch - Looped hearts; Martha Stewart Crafts
Candy sticker - Martha Stewart Crafts

Mojo Monday Sketch 2-01-10

Mojo Monday 2-01-10